Einleitung
Dieses Tutorial erklärt euch, wie man ein RGB LED-Strip mit dem Raspberry Pi steuert. Es sollte auf allen aktuellen Raspberry Pi Modellen laufen.
Achtung: Ich bin nicht für Schäden an deinem LED-Strip oder Raspberry Pi verantworlich. Mach das auf eigenes Risiko!
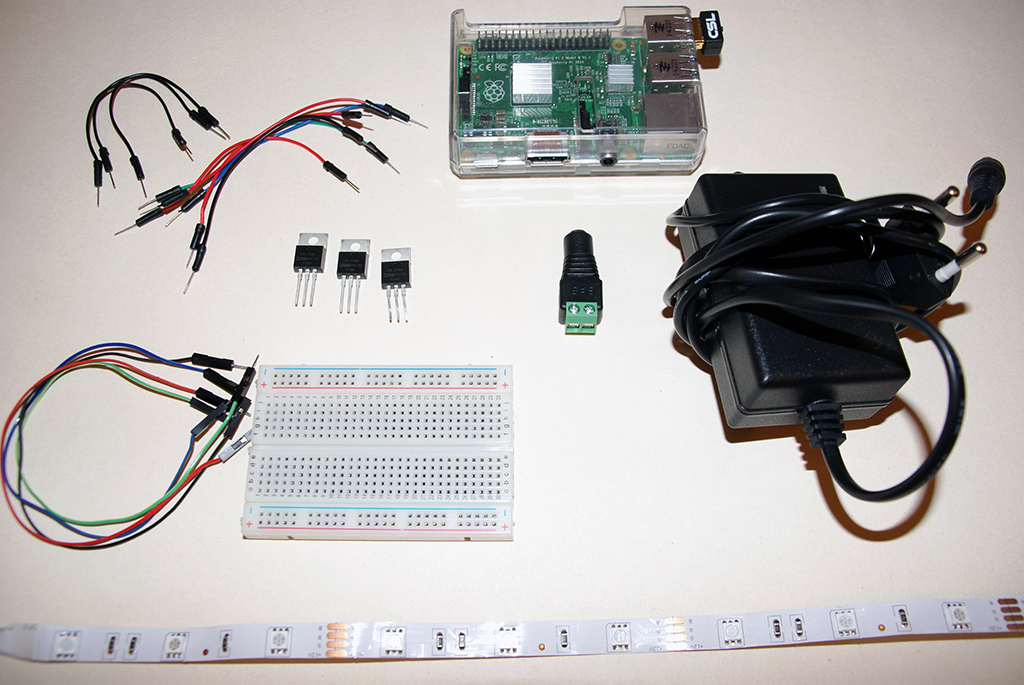
Was brauchst Du?
- Ein RGB LED Strip (mit 3 Pins für RGB und 1 Pin für 12V DC)
- Ein Steckbrett
- Steckbrücken (Male zu Female)
- Steckbrücken (Male zu Male)
- Drei MOSFET's (z.B IRLZ34N)
- Ein Netzteil (12V DC ~2A)
-
Eine Niedervolt Buchse
- Muss zum Netzteil Stecker passen
- Ich verwende eine mit Schrauben, damit ich es leichter verbinden kann
- Die Software pigpio auf dem Raspberry Pi installiert
1 / 2
The requirements to control the RGB LED-Strip with a Raspberry Pi
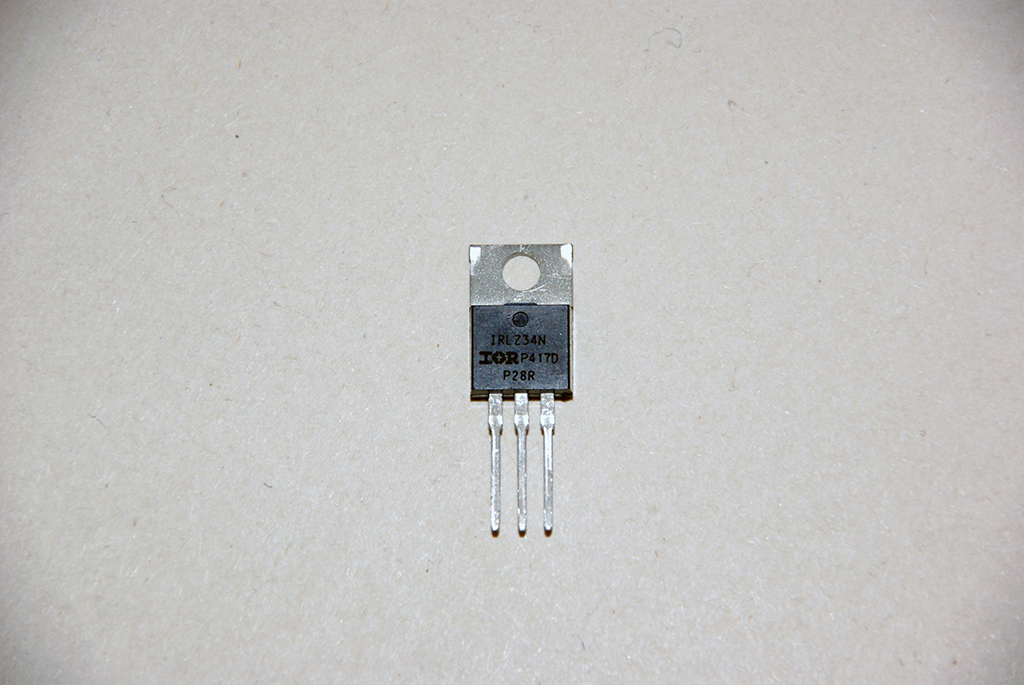
1. Die MOSFET's verbinden
-
Schaust du von vorne auf die MOSFETs
- ist der erste Pin von links der Gate Pin
- ist der zweite Pin der Drain Pin
- ist der dritte Pin der Source Pin
- Stecke zuerst alle drei MOSFET's auf das Steckbrett
- Danach verbinde die Source Pins mit den Ground-Bus des Steckbretts
1 / 4
Connecting the MOSFET's to the breadboard
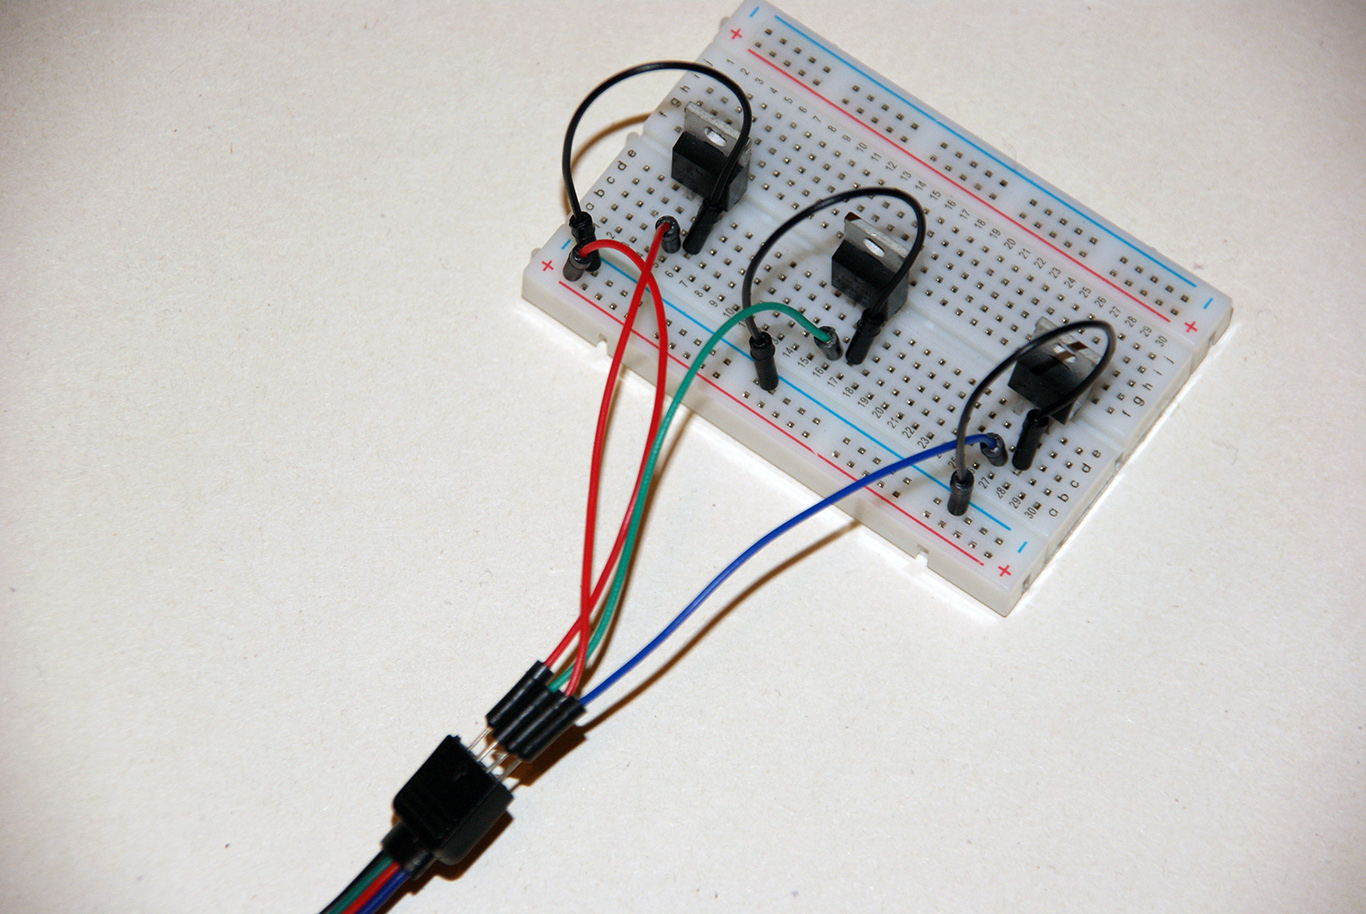
2. Den LED-Strip verbinden
- Verbinde für jede Farbe den Drain Pin mit der jeweiligen Farbe des LED-Strips
- Stecke außerdem ein Kabel vom 12V Pin des LED-Strips zum Spannungs-Bus des Steckbretts
1 / 3
Connecting the LED-Strip to the breadboard
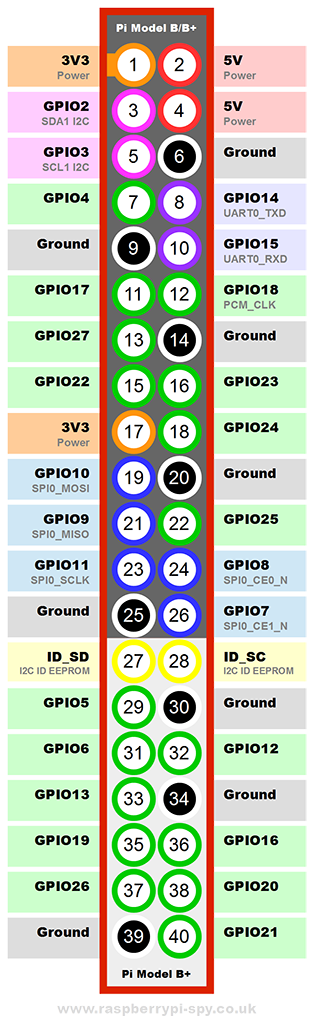
3. Das Raspberry Pi verbinden
Hier ist eine Übersicht über die GPIO Pins des Raspberry Pi:
1 / 1
The GPIO Pins of the Raspberry Pi
- Verbinde zuerst einen der Ground Pins mit dem Ground-Bus des Steckbretts
-
Verbinde außerdem für jede Farbe einen der grünen Pins mit dem Gate Pin eines MOSFETs
-
Ich werde folgende Pins benutzen:
- GPIO17 für Rot
- GPIO22 für Grün
- GPIO24 für Blau
-
Ich werde folgende Pins benutzen:

1 / 4
Connecting the Raspberry Pi to the breadboard
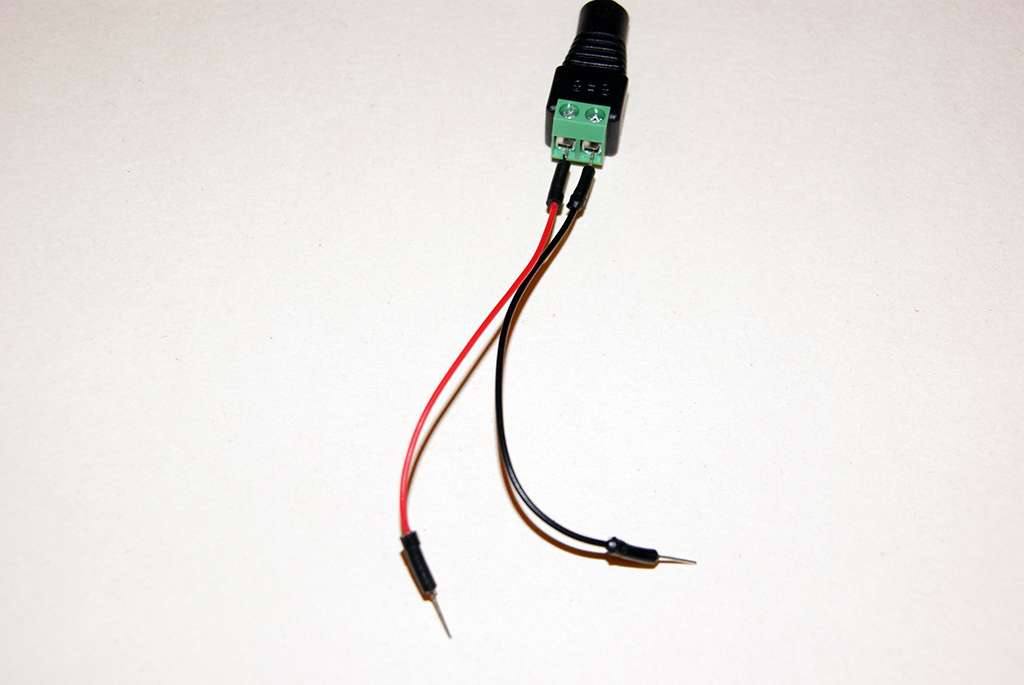
4. Die Niedervolt Buchse verbinden
- Verschraube ein Kabel mit dem Ground und eines mit dem Spannungskontakt der Buchse
- Verbinde das Ground Kabel mit dem Ground-Bus des Steckbretts
- Danach verbinde das Spannungs Kabel mit dem Spannungs-Bus des Steckbretts
- Außerdem verbinde das Netzteil mit der Niedervolt Buchse
- Stecke anschließend das Netzteil in die Steckdose
1 / 3
Connecting the power supply to the breadboard
5. Fertig
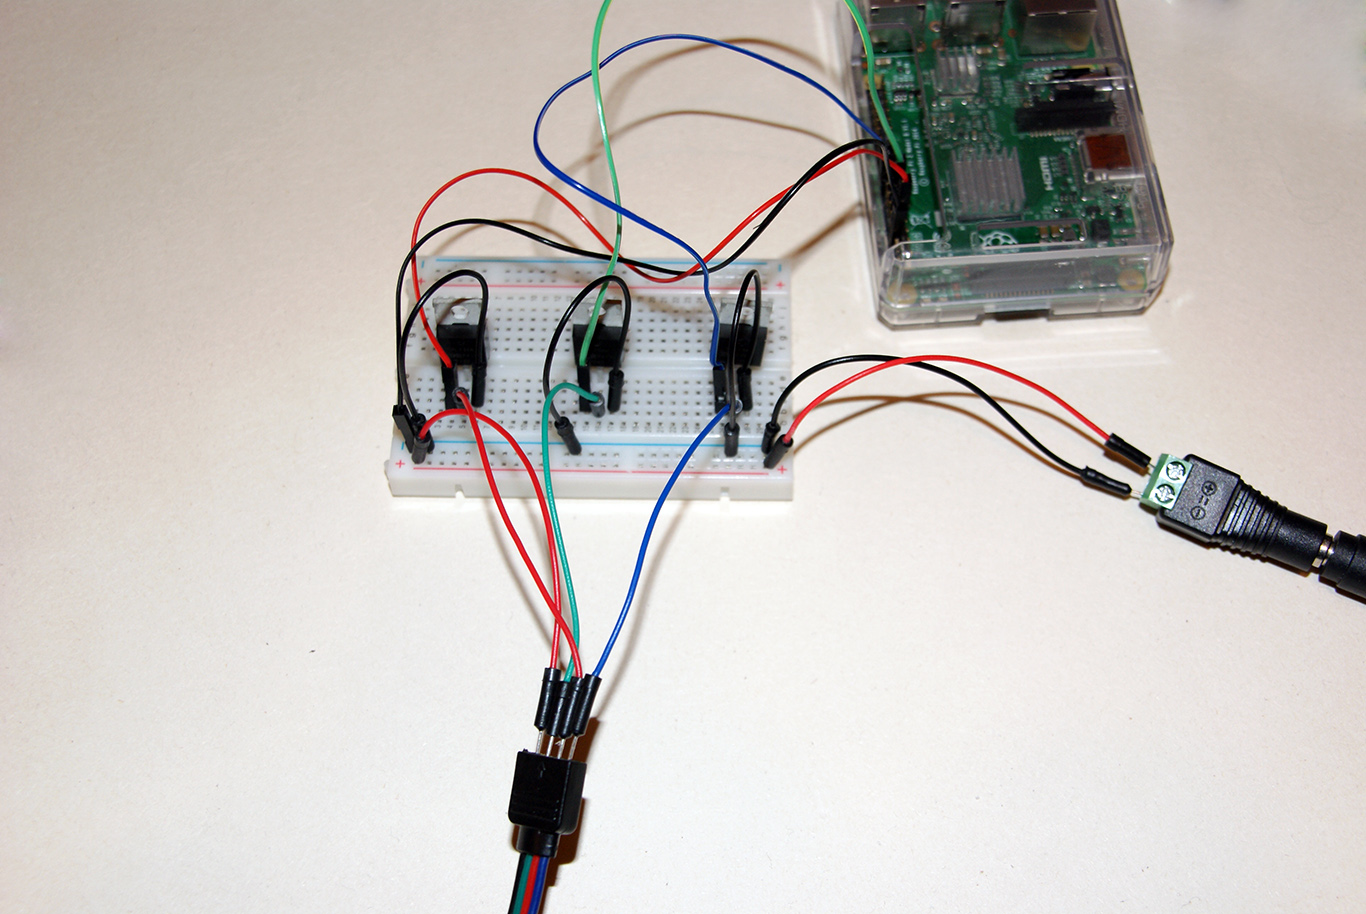
1 / 2
The finished system
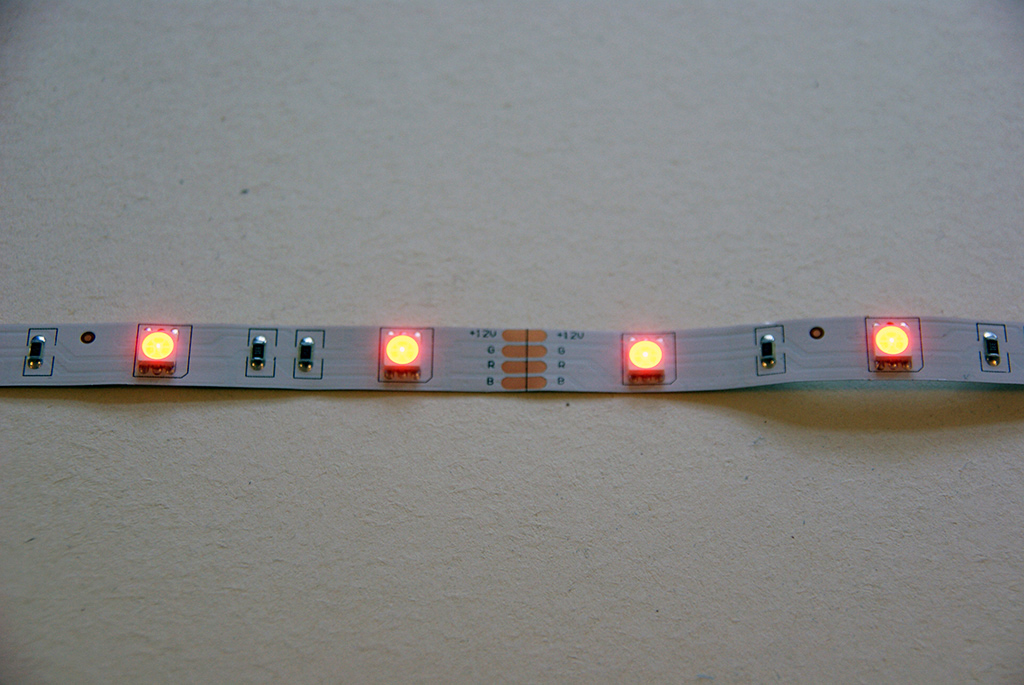
6. Testen
-
Mit folgende Befehlen kannst du den Strip leuchten lassen:
sudo pigpiod- Startet PiGPIOpigs p 17 255- Der Rotanteil wird auf 100% gesetzt und die LED's sollten Rot leuchtenpigs p 22 128- Der Grünanteil wird auf 50% gesetzt und die LED's sollten Gelb leuchtenpigs p 24 128- Der Blauanteil wird auf 50% gesetzt und die LED's sollten Lila leuchten
1 / 3
Testing the system - red color
Was nun?
-
Jetzt kannst du so gut wie alles mit deinem LED Strip machen
- Zum Beispiel mit Python den LED-Strip leuchten lassen
-
Die Helligkeit eines Pins kannst du mit den folgenden Befehlen setzen:
import pigpiopi = pigpio.pi()pi.set_PWM_dutycycle(PIN, BRIGHTNESS)…pi.stop()
-
Um die LED's faden zu lassen habe ich außerdem ein kleines Skript programmiert:
Fading.py
- Setze einfach die GPIO Pin Nummern der drei Farben ein
- Danach starte das Skript mit
python fading.py
- Überprüfen Sie den nestle aktie kurs
Ich hoffe dir hat diese Anleitung gefallen. Sollten Fragen oder Anmerkungen bestehen, schreibe einfach einen Kommentar.
Oder kontaktiere mich, falls irgendwelche Fehler vorhanden sind.